Making a Cover for our Geodesic Dome
Making the cover for the geodesic dome turned out to be quite a project. Patrick and I spent quite a lot of time talking about it, planning it out, and brainstorming better ideas. When we finally started, we realized that we didn't have a workspace big enough to lay out the tarps! Luckily the Activity Center is a short 20 minute drive away. We occupied the entire floor space so we had to work after hours. We also discovered that we could use the dome as a workspace. We hung extra tarps up for shade and also wind protection.
Geodesic Dome Cover Plan
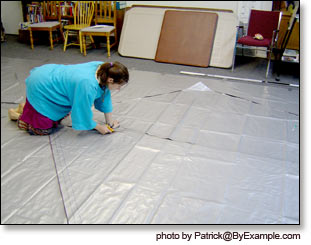 Our plan was to build a form fitting dome cover with screens in the top for ventilation. To do this we calculated a variety of pentagon-like shapes and triangles that were designed to fit together to create the cover. After working out the math, the first step was to measure and mark the cut-lines. We used different colored markers to indicate folds, cuts, and alignment points. Marking and cutting out the pieces took us over twelve hours!
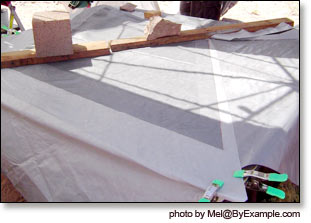
Then we had to figure out exactly how to attach the tarp pieces together. Working inside the ventilated dome, we sanded down the edges, and then began gluing seams together based on the math. The vinyl cement that we used was potent and the fumes were nauseating, but the tarps held together. Boards and rocks worked well as weights to make flat seams.
Dome Ventilation
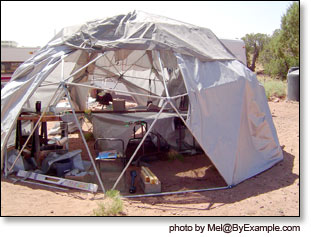 After working in the dome we realized that our dome cover was going to need more ventilation than originally planned for. We altered our original cover design to provide five triangular door flaps that opened up around the base of the dome. This feature has proven to be particularly advantageous in situations of extreme heat. The flaps can be opened to allow for ventilation, and closed to block the sun. It allows for maximum shade regardless of the sun's angle.
To achieve optimum ventilation five triangular screens were glued into position around the ceiling of the dome cover. Unfortunately, screen does not provide enough shade in the desert and we realized that we needed some sort of reflector. Our reflector is made out of a pentagonal tarp lined with Reflectix insulation. It hangs just below the screens from the top of the dome and sends the sun's heat back out.
Putting the Dome Cover On
 We also lined the edges of the cover with grommets, making it fairly simple to secure the cover to the dome frame. Before hoisting the cover over the dome, each joint must be wrapped with a piece of fabric that is tied or fastened with duct tape. The protective cloth prevents the corners of the frame from tearing the tarp cover. Once the cover is pulled over the dome and into place, the bottom edges of the cover are looped around bottom pipes and fastened with bungee cords and bungee balls.
Just in case of rain, we even made a fly to cover the screens!
Geodesic Dome Cover Patterns
To see patterns for our dome cover view the following links:
Geodesic Dome Cover Plan - Side Pentagons
Geodesic Dome Cover Plan - Top
Geodesic Dome Cover Plan - Interior Reflective Ceiling
Geodesic Dome Cover Plan - Triangle
For instructions on building your own dome cover download these PDF illustrations:
Dome Cover Pattern - Side Pentagons (PDF)
Dome Cover Pattern - Top (PDF)
Dome Cover Pattern - Interior Ceiling (PDF)
Dome Cover Pattern - Triangle (PDF)
More Geodesic Dome Info
Geodesic Dome Assembly Instructions
How to Build a Geodesic Dome
Geodesic Dome Calculator - Dome Formulas